Sunday, October 30, 2016

A Different Sort of Wreath

I love wreaths!

Do you, Glitterinas?

My newest wreath is different from any 
of the others I've made.

We attended a wedding in Indiana 
one October.
Being the born and raised Texas girl that 
I am, I went crazy for all the pretty 
leaves!

I gathered many beautiful leaves 
and pressed them in a book.

Time marched on......

Guess what I found, Glitterinas? 

I got my book off the shelf to 
read.....and out tumbled all those 
lovely leaves I had collected!

I had forgotten all about them.

Life is crazy that way, isn't it?!

I stacked them all up and knew 
I wanted to do something with them.....

......but what?

Hmmmm, a stack of very pretty, but extremely
fragile leaves.....

I took them upstairs to my 
arts and crafts desk and shuffled them around....

....arranged them in rows....

.....and then in a circle.

Oooooh, a wreath!

Then I really got the ol' creative juices 
flowing....

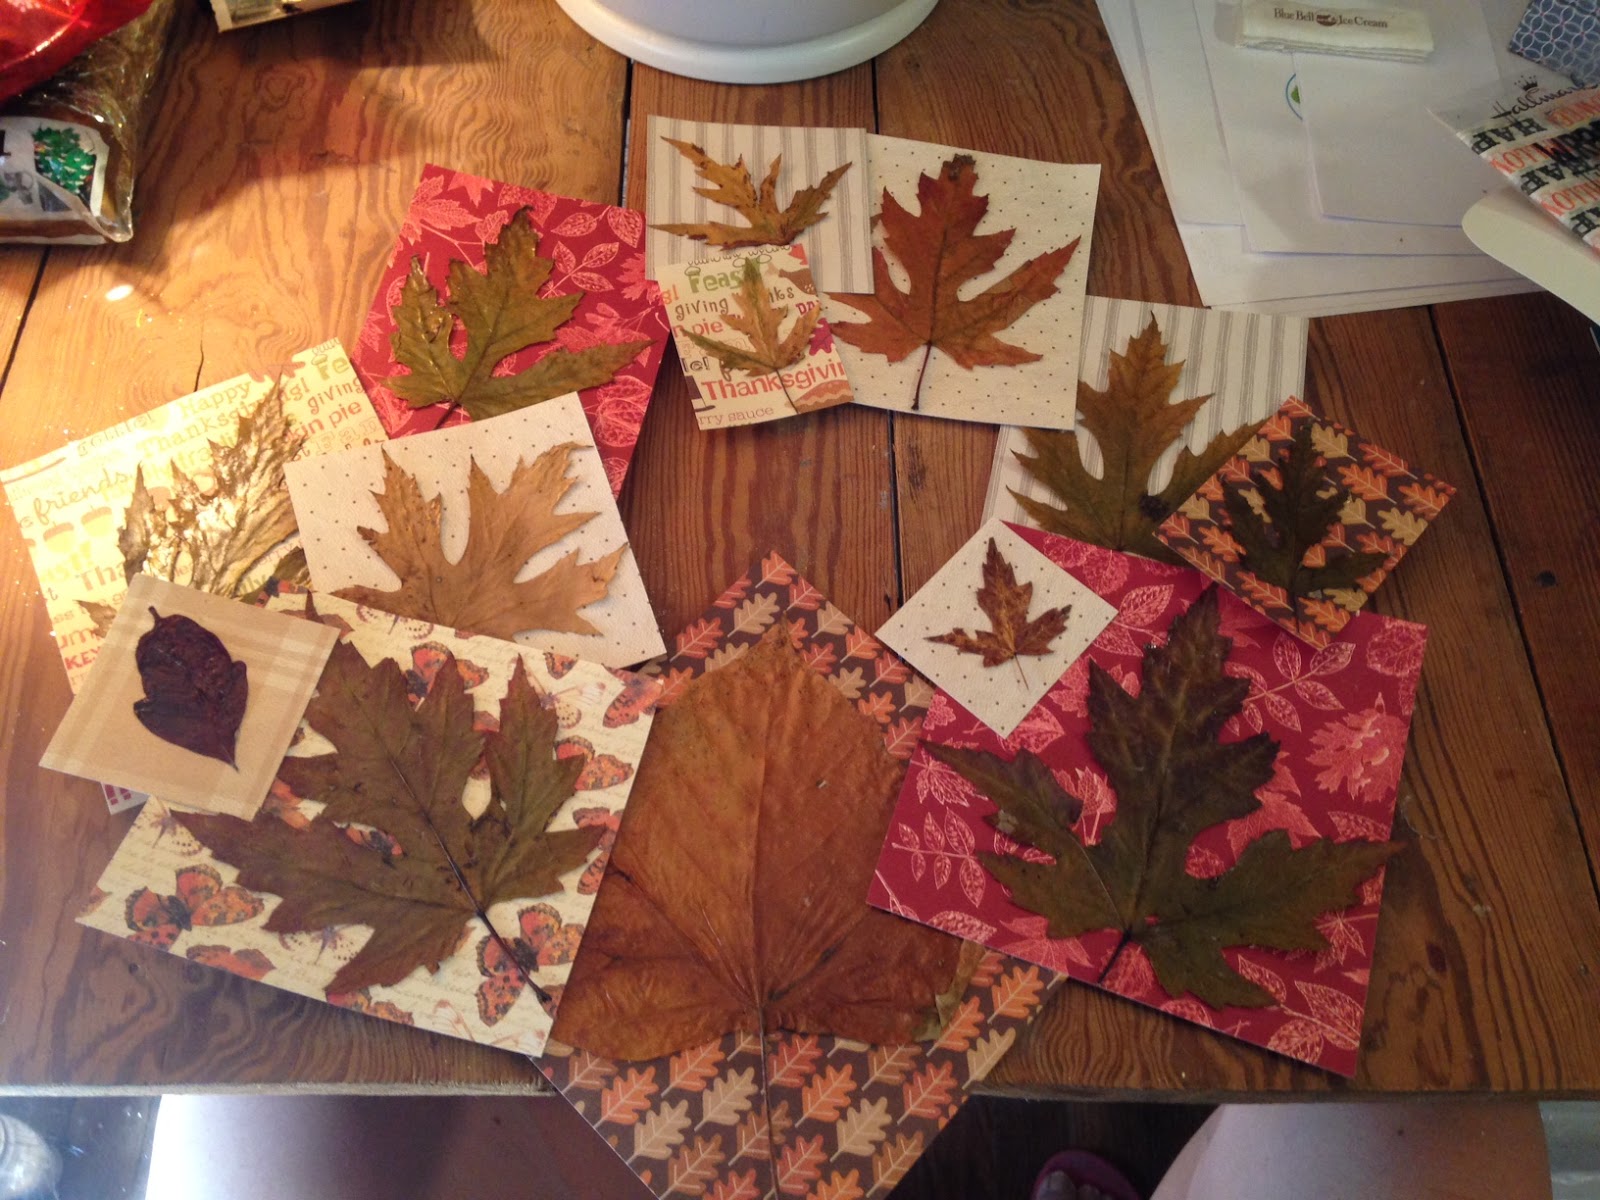
.....since the leaves were so fragile, I decided to 
give them a spray of polyurethane and then 
mount them each on a 
piece of seasonal paper.


Deciding which paper each leaf looked 
best on was interesting.

After arranging the paper and leaves this way,
and that way,
carefully,

I was finally happy with the matches.

Next, I used hot glue to attached each leaf.

My finger tips appreciate the help of a pencil eraser 
when tapping down hot, hot, hot glue!


Then I trimmed the paper down 
to a size that matched each leaf shape.


This leaf retained it's deep red coloring.....


......each one is still so pretty.


Arranging all the mounted leaves into 
a round, wreath shape was challenging.


I used a wire coat hanger as a base.

I felt like the standard metal wreath 
form would be too thick and heavy for this wreath.

I checked the size.....


Great!

Each leaf got glued on carefully.

Then I flipped the wreath over and 
put more hot glue on the back to make 
sure each piece was securely glued onto the wire.


Now, for a bow....


....just a simple burlap bow because 
the leaves are the star of 
this show!

The wreath also needed a hanging loop....


.....so I used some chiffon ribbon....


......easy peasy.


Then I carried my finished wreath 
around the house to find a 
place for it to live.


Right here on the pantry door!


This different sort of wreath adds a nice 
touch of fall to the kitchen.....


.....and I love remembering the 
happy wedding weekend 
when all these lovely leaves were 
gathered up!


Thank you so much for stopping by 
Pink Glitter!

I appreciate you letting me 
share my craft ideas and 
rambling thoughts.

Have a lovely fall day, Glitterinas!

Until next time,
Tammy


Tuesday, October 25, 2016

Tin Tote

Youngest daughter and I were shopping for 
things to decorate her new office.

I will share that decorating fun
with you soon....

but first....

I saw this and knew it had to come home 
with ME.


I like all the compartments.


Where will you put it?......
I heard my husband ask, in my mind...

Well, it will be cute in almost 
any room!....I find is a 
terrific answer!

It sits on four sturdy feet.


It will be at home on the island in the
kitchen......for now!

The fun part was filling all those
compartments.

Some bubbles for the grands
 in a leaf bowl....


....pumpkins....


.....cookies and a leaf dish....oh, and another pumpkin!


An embellished jar holding straws....


....and another jar holding some 
crazy wooden spoons!


I am so glad this little tote came to 
my house.

I think I will really enjoy it.....


.....what ever room it ends up in!


Did you notice my spider runner?

My wonderfully talented friend, Lula,
made it for me!

Thanks again, Lula, 
I love, love, love it, still.


I am glad you stopped by, Glitterinas.


Thanks so much for letting me share
my thoughts and design ramblings 
with you!


Hugs and glitter,
Tammy


Friday, October 21, 2016

Pumpkins In The Yard

I have decorated a bit out in the yard 
this year.

The pumpkins I found this season 
are so pretty....


I'll share my vintage, child sized
wheel barrow first.

This little cutie followed me home 
from Fredericksburg
years ago.


I had some flowering vines that grew up around my cucumbers 
and I liked the way they looked when they 
dried up.

They were the perfect first layer in 
the wheel barrow arrangement.


The tendrils and tiny seed pods add a good 
texture here.


I just started piling the pumpkins into the
wheel barrow.....largest to smallest.


A different angle.....


After I fiddled with the dried vines a bit 
I decided it was done!

Next, I'll share the metal, flower bench 
that I move around all over the place.


Sweet Husband bought it and brought it home 
for me when he went to a garden show 
in Austin.


It has been a great piece to have for 
taking pictures and focal spots through the 
year. 

I rolled up some grape vines loosely
and sat a big ol' pumpkin 
right in the middle.

Then I added some leaves and kept stacking 
pumpkins until I was happy 
with this autumn grouping.


.....three.....four.....


The white basket got flipped over 
for an old lantern to perch on until 
I find a mum plant to 
put in it.


This sign really brings home 
this is my favorite season!


This unusual pumpkin found the perfect
perch on the old plant stand.


This beauty was there first 
but didn't fit quite as well.


I have to take a moment 
to thank my helpers...

Margaux, the Inspector....


.....and her side kick,
Georgia!


If I am outside doing anything
they are right there, too. 


These metal jack-o-lanterns help add a 
touch of Halloween fun to the 
yard, too!


What seasonal touches do you add 
to your yard, Glitterinas?

Leave me a note so I'll know 
you stopped by.

Thanks so much for letting me 
share my yard with you.


Hugs and pumpkins,
Tammy